![](https://blogger.googleusercontent.com/img/b/R29vZ2xl/AVvXsEiew5TK8Sz-BA4Q_OcJv28Ub25yvFzdgTRppdc447O5J4N0jC7k7Vti8FksdJe3vfWCmrRQs6ZveWgpupjAngChhx_8McJmRW2pUc7mEpxg37U_sIyEdS0HGHFCSr1JU3TWaaoipKkaQU8/s320/slouch11.jpg)
![](https://blogger.googleusercontent.com/img/b/R29vZ2xl/AVvXsEjikLDw9H2KD5QRf4k0p_pvzt5c9cT5wABiU8ES6lmYCabGvjApz-2WjkJtILaddhY25KYafQ0cXe9qcCryRREa6KhlGWiJHvG4lFe9DXPfagKlgfeAYTWxW-XKEYnYTFKUVYpohzHiaZc/s320/slouch12.jpg)
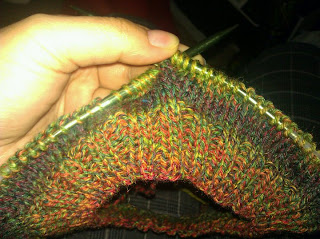
Okay, so this is my first finished knit piece that I really adore. It's not perfect, but the colors are awesome and it fits my noggin. Also, though I've been knitting for several years now, I only pick it up as a hobby during my down time, so I still consider myself a novice. This pattern is not a real pattern. I just winged it as I went.
Materials: *Double Pointed Needles in sizes 6 and 8.
*Circular Needle size 9.
*1 Skein Patons Kroy Socks FX yarn in Clover Colors.
First: Cast on 120 st on size 6 DPNs, 40 st per needle.
Rows 1-10: Work in k2p2 rib stitch for hat rim.
Row 11: Switch needles using size 8 DPNs, work in knit stitch.
Row 12: Continue in knit st, increase 1 every 20 st.
Rows 13-18: Carry over increases throughout pattern (i.e. row 13, inc 1 at every 21 st; row 14, inc 1 at every 22 st; etc).
![](https://blogger.googleusercontent.com/img/b/R29vZ2xl/AVvXsEgdOZYVnQd6qdBBRvPqaOnPfpdk1_DInKhWCEAhgv5LKmNB0RNuIpV1Fqyd8ojqMOCXeUoLWDgzTOK4G8u-ydDMfGgKJ5_qimIODelZeG_fs0OZAwG1JS3rzRqDBMB2dVajKhVB23alA8U/s320/slouch2.jpg)
Next 25 Rows: Switch to Circular needles. Use a stitch marker and mark the beginning of your row. Continue in knit st. You can add more rows to add more slouch.
![](https://blogger.googleusercontent.com/img/b/R29vZ2xl/AVvXsEg_ff3I8TqNpSJinzkJaNdcrN_Sdz7SNeZPviruDWii3F6eDBYe57BXH3Lp8GCui_C_snsIWxVnfFW0rHmfxE_pXg9oe8Y2NvlEgV8og-TIDPCdULsrOdL65t2XTkHOWzXNAX8GFz8XoKM/s320/slouch4.jpg)
![](https://blogger.googleusercontent.com/img/b/R29vZ2xl/AVvXsEiIv_-bmDENubTdPxD912PtRfD2Y2eCmH8VObRhadFyexwR9aAYaEKos1gEfq9PyShJ2VfttXYHTmWRHD2HbY3MkmxgmUb2F_3wx8xYmj7b5PJQGb8Q9DHtS4EZsz6Fiudljm_IoetXeDg/s320/slouch5.jpg)
Finishing up: Divide number of stitches evenly by 6 and mark(refer to intervals at increases). Switch back to size 8 DPNs. Begin decreasing 1 st at each marker until you have 6 st left. Loop tale of yarn through last stitches and securely tie off on the inside of the hat. Ta Da! You've knitted a slouchy hat!
![](https://blogger.googleusercontent.com/img/b/R29vZ2xl/AVvXsEiuZs7ZLAGNpKfAVISm8IEZXqWuVXoF9hWQ5napTeHQqKyV8d1Gm14ev1oY0JLoFeVfd9hXZSREl_RRZNZirAn1bgB2mF-HeYhoflbbICMuVjA_-MPpDmhGD-w4SeQignk2CGhV8SGwc0A/s320/slouch7.jpg)
![](https://blogger.googleusercontent.com/img/b/R29vZ2xl/AVvXsEhLr_YivB9zVU5na4n-WkDe07HOj8rOdeVM420SRyXG3t5EHUxLg7nclhk-B7J7KIoJhZpN0WRJ6eUsuPEDbVfLkYp31bK8dqD8wtCsa5dSmjGjJJ_r6NRnSp59CGEC0k-0bPkNz_4VwsM/s320/slouch8.jpg)
![](https://blogger.googleusercontent.com/img/b/R29vZ2xl/AVvXsEgQutuMQhoRN8LMGcblnS54DTo9OQhg4s0cpXzvb_MXadsKdEZiGHDu48kG_Vy93nLLhqkfiGV346UtGJP0s-7AW8D8Vyqp3xhd7xBZMEl5uZVX4q2rX6upufP4R5bWqD4CP_CEg9I9FBQ/s320/slouch9.jpg)
![](https://blogger.googleusercontent.com/img/b/R29vZ2xl/AVvXsEjbZwkMc_gqF5gmmEM4XeJ4yog9GnBN6T2OFeUFyDcKxlhhfxd_a6ZAxtwnnOeX_JexThUJ7z1xUcuCuruvdcFbR6hgpNr_NQ5ixczQawJIhh9eMD-oqama5tmDGB2F0NL_xvuPHoY4GXs/s320/slouch10.jpg)
**Shaping** My hat seemed a bit funky, so I put it on a dinner plate and lightly sprayed some warm water on it. Let it sit over night and dry. It should have a smoother rounded shape.